The screenshot is one of the useful things that has ever been created. Sometimes you just need to show important information to someone else the things present on your screen. Sometimes describing what’s on your screen is a hassle. In such cases, a screenshot is the easiest thing you can do.
However, it’s important to know how to take screenshots no matter what computer platform you are using. If you want to take a screenshot on Chromebook, you don’t need to install any third-party apps or additional tools. It’s easy to take a screenshot on Chromebook.
In this article, we’ve managed to provide you an easy guide to take a screenshot on a Chromebook.
How to take a Screenshot on a Chromebook?
Taking a screenshot is a little bit confusing for people, just follow this easy guide to take a screenshot without getting confused.
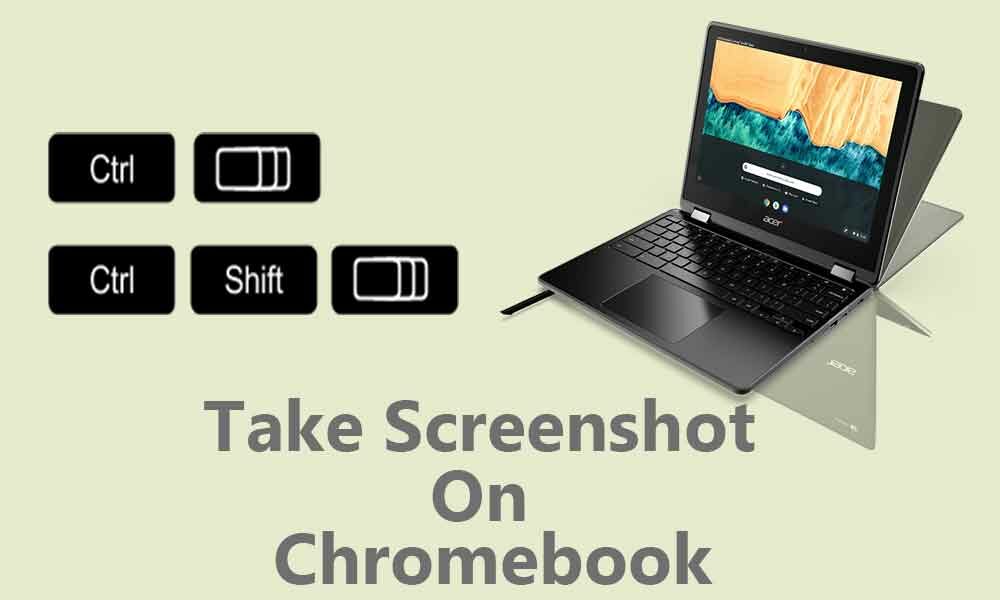
- Just press the Ctrl+Show shortcut key simultaneously to take a screenshot of your whole screen of Chromebook. The show button is located on the top center of the keyboard, a rectangular with 2 lines on the right side, and the Ctrl key is located at the bottom left on the keyboard.
- Sometimes, you just need to take a screenshot of a specific part of the screen on the Chromebook. It’s similar like you are cropping the image, for that just press the Shift+Ctrl+Show key together. Use your cursor to take a screenshot need to be taken. The Shift key is located just above the Ctrl key at the left bottom of your keyboard.
The taken screenshot will pop up on the right bottom of your screen, it will provide you’re the options like either copy the screenshot to the clipboard to annotate the image.
If there is no popup appear for the screenshot, it will be saved to the download folder of the Chromebook.
- Just click on the launcher located at the left bottom of the screen.
- Now, search for the files option, you can take the help of the up arrow to visible to options and click on the file’s icon.
- The icon will open the file manager, and search for the download folder under My files.
- The screenshot will be available there.
Read More: Steps to Change Date and Time on Chromebook
What if you want to delete the screenshot of the Chromebook?
After you sent the screenshot to the specific person on Chromebook. There is no need to keep the screenshot as it will take extra memory. Or it also happens like we mistakenly take 2-3 screenshots and need to be deleted. For that kinda situation follow the below steps:
- Select the launcher on the bottom of your screen and click on files.
- Click the file that needs to be deleted under my files.
- To get wipe out unwanted files, select the trash bottom of the screen.
That’s how you delete the unwanted screenshot on Chromebook.
How to take a Picture on Chromebook?
Chromebooks come with great HD cameras useful for video calls, record HD videos, or capturing photos. To take pictures on Chromebook, just follow the steps mentioned below.
- Open the launcher on the left bottom of the screen.
- Select the camera option, you can use the up arrow to display more options.
- Just press the capture button to take photos visible in a grey and white circle with a blue outline.
That’s it for now. You can comment below for your further queries or your experiences. Till then stay tuned for more info. You can also follow us on Google News or Telegram group for real-time notifications whenever Gadget Headline publishes any post.







![How to Use Bing AI Chat in Any Browser [Easy Steps]](https://www.gadgetheadline.com/wp-content/uploads/2023/10/How-to-Use-Bing-AI-Chat-in-Any-Browser-Easy-Steps.jpg)
2 Comments
This blog post was very helpful for me to learn how to take a screenshot on a Chromebook. I didn’t know there were so many options and keyboard shortcuts to do it. that was not answered in this post: How can I edit my screenshots after taking them? Is there a built-in editor or do I need to use a third-party app? I would appreciate some guidance on this topic.
Yes. You can use the native image editor from the Files app. Otherwise, go to Google Photos and head over to Library. Then select the screenshot and edit accordingly.