Player First Games and Warner Bros. Interactive Entertainment have released MultiVersus as the open beta early access recently for the Windows, PS4, PS5, Xbox One, and Xbox Series X|S platforms. The game will go live publicly on July 26, 2022. It’s a free-to-play crossover fighting game between iconic characters with 2v2 matches online. Meanwhile, it seems that some players are facing the MultiVersus Syncing Account State issue while trying to get into matches.
Well, it seems one of the common bugs in the early access beta needs to be fixed ASAP. As the game is in the beta stage right now, it may take some time for the developers to come up with potential fixes.
Unfortunately, there are a couple of issues or bugs appearing to the MultiVersus players irrespective of the platform. Now, the account syncing issue during getting into the multiplayer match is bothering players a lot.
What Does Actually Mean ‘Syncing Account State’?
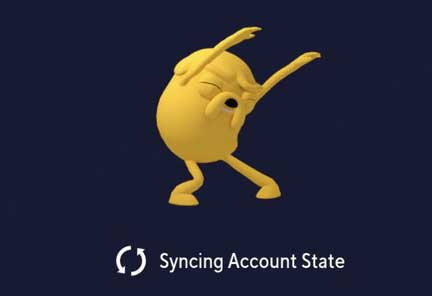
It basically prevents MultiVersus players from getting into the matches whatsoever. To be precise, whenever you launch the MultiVersus game on your device and enter into the open beta stage, you may see the ‘Syncing Account State’ error notice on the bottom right side of the screen infinitely.

Yes! The specific error appears infinitely and the screen doesn’t go beyond that. So, the chances are high that somehow your account details or matchmaking process is unable to be retrieved from the game servers. It doesn’t show any additional info.
Now, if you’re also going through the same issue then make sure to follow this troubleshooting guide. There are a couple of potential workarounds mentioned below that might resolve the issue.
How to Fix MultiVersus Syncing Account State Error
The MultiVersus team (Player First Games) is quite aware of this particular issue that has been reported by multiple players in a short period of time. The team also acknowledged the same on a recent tweet by the official MultiVersus Twitter handle that you can check out.
The MultiVersus Twitter team has acknowledged restarting the game may fix the issue right now as they’ve made some improvements on the server side. Though the problem should have been fixed for the majority of players, some may face it to date.
Exit and Quit the Game Properly
First of all, you should try to exit and quit the MultiVersus game properly no matter which device you’re using. Sometimes not quitting the game file or processes on the system may cause issues with the server connectivity when trying for the next time.
Once done, make sure to launch the MultiVersus game again to check for the issue. According to the MultiVersus Twitter team, they’ve implemented a fix to avoid the ‘syncing account state’ error on the loading screen.
Reboot the System
Another thing you should do is to just restart the system (gaming device) properly after closing the game. It eventually refreshes the system cache and allows the program to load once again. Some affected players did find this method useful.
Just make sure to Shut Down or Power OFF the PC/console > Unplug the power cable from the gaming device > Wait for at least 5 minutes or so and then plug back the power cable in > Power ON (Boot) the device > Try launching the game again.
Reconnect the Internet Network
Make sure to disconnect and reconnect the internet network on the respective gaming device. It’s recommended because the temporary cache or networking glitch can also trigger server connectivity issues in most scenarios.
If in case, you have an ethernet (LAN) wired connection then just use it to check if the problem has been fixed or not. If you’re only using the Wi-Fi network then try using a different Wi-Fi connection to cross-check the account syncing state error with MultiVersus.
Alternatively, you can also try using the mobile data hotspot to check for the issue. Though mobile data hotspots might not be a good choice to play online games on a PC or gaming console due to slow speed, you can find out the reason at least.
You should also perform a power cycle method on your Wi-Fi router to ensure there is no conflict with the networking glitch whatsoever. Just Power OFF the router and disconnect the power adapter from the router. Then wait for 5 minutes or so.
Next, make sure to reconnect the power adapter > Turn ON the router and connect to the Wi-Fi network again > Try launching the game to check for the issue.
If in case, there is no issue with the internet connection at your end then make sure to follow the next method.
Update MultiVersus
It’s also useful to check for the game update and install it whenever available. Respective of your gaming platform, you can follow the steps below.
For PC: (Steam)
Either you can set the automatic game update on Steam or you can manually check for available updates. To do that:
- Open your Steam client > Click on LIBRARY.
- Now, right-click on MultiVersus from the left panel.
- Select Properties from the drop-down list.
- Click on the UPDATES section from the left panel.
- Click on the AUTOMATIC UPDATES drop-down menu.
- Here click on ‘Always keep this game updated’. [The game and its updates will be automatically acquired as soon as they are available.]
Alternatively, you can try manually checking for the available game update and install it by following the steps below:
- Open your Steam client > Click on LIBRARY.
- Now, click on MultiVersus from the left panel.
- Once the game library interface appears, you’ll be able to see the UPDATE button. [If an update is available]
- Click on it and wait for the process to be completed. It may take some time depending on the update size and internet speed.
- Once done, make sure to reboot the Steam client, and launch the game.
For PC: (Microsoft Store)
If you’ve installed the MultiVersus game via the MS Store UWP application then follow the steps below to update it.
- Open the Microsoft Store app from the Start Menu.
- Click on the Library icon from the bottom left panel.
- Now, click on the ‘Get Updates’ button to check for available updates.
- It may take some time to check for available updates of the installed programs.
- If available, it’ll automatically start downloading and installing the update.
- Once done, make sure to reboot the PC to apply changes.
For Xbox Consoles:
Xbox One and Xbox Series S/X console users can perform the steps below to update the game.
- Go to the ‘My Games and Apps’ section from the home menu.
- Select the ‘Manage’ tab > Select the ‘Updates’ tab.
- Here make sure to highlight ‘MultiVersus’ > Hit the ‘Update’ button.
For PlayStation Consoles:
PlayStation 4 or PlayStation 5 console users can follow the steps below to check for game updates.
- Go to the ‘Games’ tab from the home screen.
- Now, highlight ‘MultiVersus’ > Select ‘Options’.
- Select ‘Check for Updates’ > If there is an update available, it’ll notify you.
- Just ‘Download and Install’ it > Reboot the console to apply changes.
Verify and Repair Game Files on Steam (PC)
In some cases, it may also be possible that somehow your game files are missing textures or other content from the installed directory. It’ll obviously cause in-game crashing or even while trying to get into the game server.
Therefore, you should follow the steps below to verify and repair the game files on the Steam client to automatically resolve several issues.
- Before performing this method, make sure to restart your computer.
- Now, launch Steam > Click on LIBRARY.
- Right-click on the MultiVersus game from the left panel.
- Then click on Properties from the drop-down menu.
- Select the LOCAL FILES tab > Click on the Verify integrity of game files… button.
- Steam will start verifying the game files and this process may take several minutes.
- Wait for it to complete and then reboot the PC once again to apply changes.
- Finally, launch the Steam client, and run the MultiVersus game to check for the issue.
Note: If one or more files fail to verify, you should safely ignore the message. It’s quite normal for most Steam games. The files that fail to verify are local configuration files. Do Not Perform other heavy tasks while verifying game files.
Clear Cache on PC and Consoles
It’s highly suggested to clear the game cache data on the gaming device to help improve gameplay. Temporary files and cache data are often stored on the device to smoothly run programs. But that’s not the case for everyone and every time.
Over a period of time, the cached data may become corrupted which can eventually lead to several issues with connectivity, lags, performance, slow loading, and more. Depending on your gaming platform or device, you can follow the steps below.
For PlayStation 5:
The PlayStation 5 doesn’t have a specific menu option to clear the cache. However, you can force the cache to be cleared by doing the following:
- First, Power OFF your PlayStation 5 console. [Do not enter Rest Mode]
- Wait for the LED indicator lights on your console to turn off completely.
- Once done, make sure to unplug the power cord from the back side of your PlayStation 5.
- Now, wait for at least one or two minutes.
- Then plug back the power cord into your PS5.
- Power ON your PlayStation 5 and check for the issue.
For PlayStation 4:
The PlayStation 4 doesn’t have a specific menu option to clear the cache. However, you can force the cache to be cleared by doing the following:
- Power OFF your PlayStation 4. [Do not enter Rest Mode]
- Once the indicator light on top of your PlayStation 4 is off and has stopped blinking, unplug the power cord from the back of your console.
- Wait for at least 30 seconds and then plug back the power cord into your PlayStation 4.
- Finally, Turn it ON, and run the MultiVersus game to check for the issue.
For Xbox Series S|X:
If you’re using the Xbox Series X|S console then make sure to follow the steps below to power cycle it.
- Turn OFF your Xbox Series X|S using the controller or the Power Off button on the console.
- Unplug the power cable from the back of your Xbox Series X|S.
- Wait for at least two minutes then plug back the cable into your Xbox Series X|S.
- Turn ON your Xbox Series X|S.
Clear Persistent Storage: (Xbox Series X Only)
This specific method is software-specific and only applicable to the Xbox Series X console right now. If the power cycle method didn’t come in handy for you on the Xbox Series X console then you can follow this method.
- Press the glowing Xbox button on your Xbox controller.
- Scroll to the right side and select Profile & System.
- Select Settings by pressing the A button on the controller.
- Now, select Devices & Connections.
- Select Blu-Ray > Choose Persistent Storage.
- Hit the Clear Persistent Storage option.
- Wait for the process to complete and reboot the console.
For Xbox One:
The Xbox One does not have a menu option to clear the cache on the console. Instead, follow these steps to clear the cache on an Xbox One:
- Turn OFF your Xbox One.
- Once the indicator lights on the front of the Xbox One and the console’s power brick are off, unplug the power brick from the back of your console.
- Wait for at least 30 seconds then plug back the power cable into your Xbox One and turn it ON.
For PC: (Steam)
The Steam client offers a feature that verifies the integrity of your game cache. So, you can follow the verify and repair method to clear the game cache mentioned in the previous method. If you’ve already followed that, skip to the next one.
Try Deleting Saved Game Data
Game saves, player profiles and other game data are automatically saved in the PlayStation 4 System Storage by default. If you assume that data is corrupt, you can delete it from your hard drive.
For PlayStation 4:
Please Note: Deleting saved game data is permanent and can’t be restored. So, it’s highly recommended you back up your saved game data to online storage or a USB storage device.
Follow these steps to access the System Storage and delete game data:
- From the dashboard interface, open the Settings menu.
- Select Storage > Select System Storage.
- Choose Saved Data > Select the MultiVersus game to access the saved data.
- Hit the Options button > Hit the Delete button.
- Choose the saved data files that you want to delete.
- Next, select Delete to confirm again > Wait for the process to complete.
- Finally, make sure to reboot the console to change the effects.
For Xbox One:
Game saves, player profiles and other game data are automatically saved to the Xbox One hard drive by default. If you feel that data is corrupt, you can delete it from your hard drive.
Please Note: Deleting saved game data is permanent and can’t be restored. So, it’s highly recommended to back up your saved game data to online storage or a USB storage device.
Follow these steps to access the System Storage and delete game data:
- From the Xbox Home interface, go to Settings.
- Head over to System and choose Storage.
- Select Manage Storage on the right-hand side of the screen.
- Then select View contents > Highlight the MultiVersus game.
- Press the Menu button and select Manage Game.
- Select Saved data on the left-hand side of the screen.
- Choose the MultiVersus game to access the saved data.
- Next, you can Delete the game-saved data files via the Options Menu.
Reinstall the MultiVersus Open Beta
Last but not least, try uninstalling and reinstalling the MultiVersus game (Open Beta Access) on the respective gaming device to ensure whether the problematic game files are troubling or not. Sometimes issues with corrupted or missing game files can be a major reason.
So, once you’ve uninstalled the game from your device, make sure to reboot the system to refresh it. Next, you can head over to the respective game store or launcher & reinstall the MultiVersus game properly.
Are you interested in using invoices for your customers in an innovative way? Check out the Zintego App to try it for free.
This time we’ll recommend you install the game on a different drive to check for the issue. Obviously, it may take some time to download and install the game. Once done, make sure to launch the game to check for the issue again.
For more news updates and guides, follow this blog. If you have any queries just mention them in the comment section below, till then stay tuned.
You can also follow us on Google News and Telegram Channel for real-time notifications whenever we publish any post.
Follow us on social media – Twitter, Facebook, and Instagram. You can also subscribe to our newsletter for daily updates.


